


How to Attach Beaded Bag Handles: Your Complete Professional Guide

How to Attach Beaded Bag Handles: Expert Methods for Durable Connections
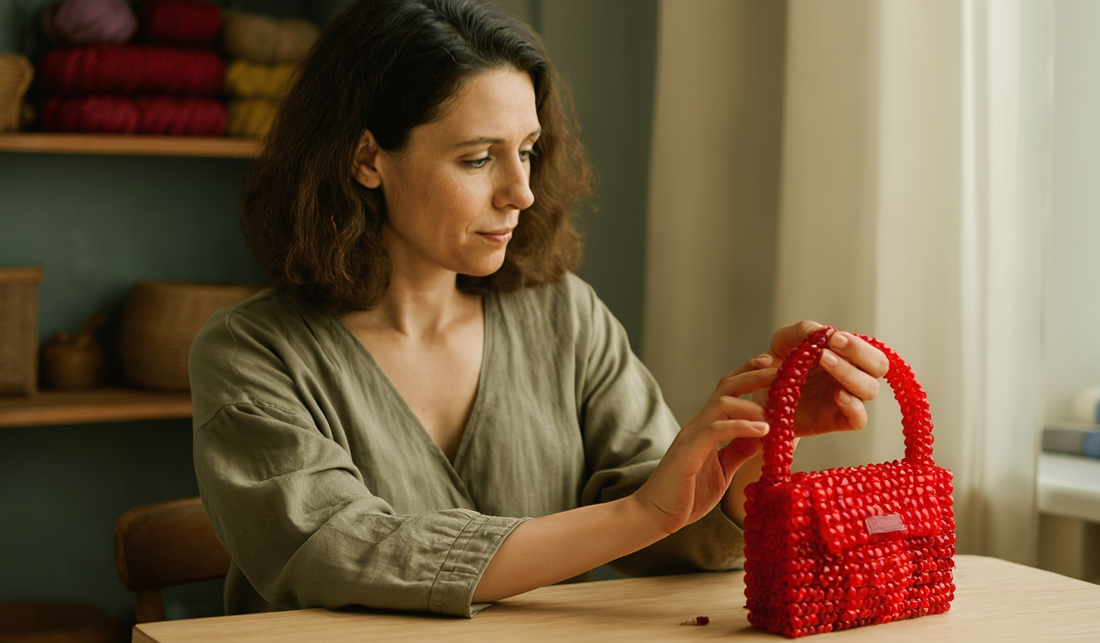
Learning how to attach beaded bag handles properly transforms beautiful beadwork into functional accessories that withstand regular use without structural failures. The connection between beaded bag handles and the bag body represents the most critical stress point in any handbag design—improper attachment leads to devastating failures where handles tear away from carefully crafted beadwork, ruining both your effort and your accessory. Understanding professional attachment techniques ensures your beaded bag handles remain securely connected through years of carrying, maintaining both beauty and functionality.
Attaching beaded bag handles requires more than simply sewing or gluing straps to your bag. Professional techniques distribute stress across wider areas, reinforce connection points with hidden support materials, and use attachment methods specifically suited to beadwork's unique structural characteristics. Whether you're working with delicate beaded handles made entirely of beads and thread, heavy chain straps, fabric-covered handles, or wooden bead handles, each material requires appropriate attachment approaches that accommodate its specific weight, flexibility, and stress patterns.
The complexity of attaching beaded bag handles varies based on your bag construction method and handle style. Handles integrated during initial bag construction offer superior strength compared to those added afterward, while removable handles provide versatility but require specialized hardware. Understanding these options helps you select attachment methods aligned with your beaded bag's intended use—occasional evening accessories tolerate lighter attachment than daily-use bags requiring industrial-strength connections.
Mastering how to attach beaded bag handles elevates your beading skills from intermediate to advanced, ensuring every accessory you create combines artistic beauty with engineering integrity. This comprehensive guide reveals professional attachment techniques used by expert bag makers, providing the knowledge to connect any handle style to any beaded bag with confidence that your work will last! 💎✨👜
Understanding Handle Types and Attachment Requirements
Before learning specific techniques for how to attach beaded bag handles, understanding different handle styles and their unique structural requirements helps you select appropriate attachment methods that ensure secure, long-lasting connections for your beaded bag.
Common Beaded Bag Handle Styles
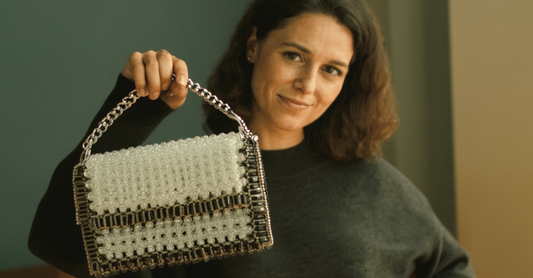
- Chain Handles: Metal chains in gold, silver, or rose gold finishes offer elegant options for beaded bag handles, with weights ranging from delicate jewelry chains to substantial hardware chains
- Beaded Handles: Fully beaded straps created using the same techniques as bag body provide cohesive beaded bag aesthetics but require careful attachment due to thread-based construction
- Fabric-Covered Handles: Wooden or plastic handle cores wrapped in coordinating fabric create comfortable grips for beaded bag handles while adding textural contrast
- Leather Straps: Genuine or faux leather strips provide classic beaded bag handles with durability and professional appearance suitable for various bag styles
- Wooden Bead Handles: Large wooden beads strung on cord or thread create bohemian-style beaded bag handles perfect for casual summer accessories
- Acrylic or Resin Handles: Molded decorative handles in various shapes and colors offer trendy options for contemporary beaded bags
Weight and Stress Considerations
- Lightweight Handles: Delicate chains or small beaded straps suitable for evening clutches or small beaded bags used occasionally require moderate attachment strength
- Medium-Weight Handles: Standard chain or fabric handles for everyday beaded bags need reinforced attachment that distributes stress across wider areas
- Heavy-Duty Handles: Substantial chains, thick leather, or large wooden beads for larger beaded bags demand industrial-strength attachment with multiple reinforcement layers
- Adjustable Weight: Removable beaded bag handles allow changing between lightweight and heavier options depending on occasion and contents weight
- Dynamic Stress: Consider that filled beaded bags create significantly more handle stress than empty ones—attachment must accommodate maximum anticipated weight
Attachment Point Locations
- Top Edge Attachment: Most common placement for beaded bag handles, connecting to the bag's upper edge or rim with visible or concealed hardware
- Side Panel Attachment: Alternative positioning where handles attach to bag sides rather than top, creating different silhouettes and stress distribution
- O-Ring Integration: Metal rings incorporated into beaded bag construction during initial creation provide ideal attachment points for removable handles
- Frame Channel Attachment: For frame-style beaded bags, handles often attach directly to metal frame hardware rather than beaded surfaces
- Sewn-In Handles: Beaded bag handles integrated during construction rather than added afterward offer superior strength through complete structural integration
Hardware Options for Handle Attachment
- Jump Rings: Small metal loops that connect chain handles to attachment points on beaded bags, available in various sizes and finishes
- Lobster Clasps: Allow removable beaded bag handles that disconnect easily for storage or style changes
- D-Rings: Semi-circular or D-shaped metal loops sewn or attached to beaded bags that accept various handle styles
- Swivel Clips: Rotating hardware prevents twisted handles on beaded bags while providing secure connections
- Screw Posts: Permanent hardware that bolts through bag material for maximum-strength handle attachment to beaded bags
Structural Integrity Assessment
- Bag Construction Review: Examine how your beaded bag is constructed to identify strongest areas for handle attachment that won't compromise beadwork
- Material Strength: Consider whether your bag's base material can support handle attachment stress or requires reinforcement layers
- Existing Weak Points: Identify and avoid areas where beaded bag construction creates natural weakness that could fail under handle stress
- Balance Considerations: Position handles symmetrically on beaded bags to distribute weight evenly and prevent lopsided appearance
- Future Repair Access: Plan handle attachment in ways that allow future repairs or replacements without destroying your beaded bag
Understanding these foundational concepts ensures you select appropriate attachment methods that match your specific beaded bag handles to your bag's construction, intended use, and structural capabilities.
Essential Materials and Tools for Handle Attachment
Successfully attaching beaded bag handles requires gathering specialized materials and tools before beginning your project. Having proper supplies ensures secure connections and professional results that maintain both functionality and aesthetic appeal in your beaded bag.
Reinforcement Materials
- Ultrasuede or Leather Patches: Small patches (2x2 inches) placed behind handle attachment points distribute stress across wider areas in your beaded bag
- Heavy-Weight Interfacing: Pellon Peltex or similar stiff interfacing reinforces attachment areas where handles connect to beaded bags
- Plastic Canvas Pieces: Small trimmed sections provide rigid backing for handle attachment points that bear significant weight on beaded bags
- Metal Washers: Flat metal discs placed between handles and bag material distribute stress and prevent hardware from pulling through beaded bags
- Grosgrain Ribbon: Reinforcing strips sewn along top edges before handle attachment strengthen the entire connection area on beaded bags
Thread and Cord for Attachment
- Heavy-Duty Thread: Upholstery thread or bonded nylon thread (size 69 or higher) provides strength needed for beaded bag handle attachment
- Waxed Linen Thread: Traditional bookbinding thread offers superior strength and grip for hand-sewn handle attachments to beaded bags
- Beading Wire: Flexible .018-.024 inch wire works for securing chain handles to beaded bags through multiple wrapping passes
- Fluorocarbon Line: 0.6mm or heavier fishing line provides invisible strength when attaching handles to beaded bags with visible connection points
- Leather Cord: Round or flat leather lacing creates decorative functional connections for certain beaded bag handle styles
Adhesives and Sealants
- E6000 Industrial Adhesive: Maximum-strength clear-drying glue for permanent handle attachment to beaded bags requiring adhesive bonding
- Fabric Glue: Aleene's Fabric Fusion or similar flexible fabric adhesive works for securing reinforcement patches during handle attachment
- Epoxy Resin: Two-part epoxy creates permanent bonds for metal hardware attachment to beaded bag structures
- Thread Sealant: Fray Check or clear nail polish secures knots and thread ends when attaching handles to beaded bags
- Hot Glue: Quick-setting adhesive for temporary positioning of handles before permanent attachment to beaded bags
Hardware and Fasteners
- Jump Rings: Various sizes (6mm-15mm) in finishes matching your handle hardware for connecting chains to beaded bags
- Split Rings: More secure alternatives to jump rings for permanent handle attachment to beaded bags
- D-Rings: 1/2-inch to 1-inch metal loops in gold, silver, or gunmetal for mounting handles on beaded bags
- Lobster Clasps: 12mm-20mm swivel clasps allow removable handles on versatile beaded bags
- Rivets or Eyelets: Metal reinforcements that create permanent secure attachment points for handles on beaded bags
Essential Tools
- Pliers Set: Chain-nose, round-nose, and flat-nose pliers for manipulating jump rings and hardware when attaching handles to beaded bags
- Leather Punch: Creates clean holes in leather or heavy fabric for handle attachment hardware on beaded bags
- Heavy-Duty Needles: Leather needles or curved upholstery needles for hand-sewing handles to beaded bags
- Awl: Pointed tool for creating pilot holes that guide needles during handle attachment to beaded bags
- Clamps or Clips: Hold handles in position during glue drying or while securing permanent attachments to beaded bags
- Measuring Tape: Ensures symmetrical handle placement on beaded bags
Safety Equipment
- Protective Gloves: Nitrile gloves protect hands from adhesives when attaching handles to beaded bags
- Safety Glasses: Eye protection when using pliers or cutting hardware for beaded bag handle attachment
- Cutting Mat: Self-healing mat protects work surfaces during handle preparation and attachment to beaded bags
- Ventilation: Adequate airflow when using strong adhesives for handle attachment to beaded bags
Investing in quality materials and proper tools makes attaching beaded bag handles significantly easier while ensuring professional results that withstand years of use without failures.

Step-by-Step Methods for Different Handle Types
Attaching beaded bag handles successfully requires using specific techniques appropriate for each handle style and bag construction method. These comprehensive approaches ensure secure connections that maintain both functionality and aesthetic appeal in your finished beaded bag.
Chain Handle Attachment Techniques
- Jump Ring Connection Method: Open jump rings using two pliers (twist sideways, never pull apart), thread through beaded bag attachment points and chain ends, then close securely by reversing the twisting motion
- Direct Weaving Technique: Thread strong beading wire or fluorocarbon line through chain end links, then weave through multiple beads along beaded bag top edge for distributed stress
- O-Ring Integration: If your beaded bag incorporates O-rings during construction, simply attach chain handles using jump rings or lobster clasps through these permanent attachment points
- Split Ring Security: For permanent chain handle attachment, use split rings instead of jump rings—they're more secure and won't accidentally open on beaded bags
- Multiple Connection Points: Attach each chain end to 2-3 separate locations along beaded bag edge rather than single points for superior stress distribution
Beaded Handle Attachment Process
- Thread Continuity Method: When possible, create beaded handles using thread continuous with bag body construction, eliminating separate attachment for strongest connection to beaded bags
- Reinforced Loop Creation: Finish beaded handles with loops of multiple thread passes through final beads, then attach these loops to beaded bag top edges using additional thread weaving
- Hidden Wire Cores: Insert flexible beading wire through beaded handle centers for strength, then attach wire ends to reinforced points on beaded bags
- Knotting and Sealing: Secure all thread ends with surgeon's knots, apply thread sealant, then weave ends into nearby beadwork on your beaded bag
- Stress Testing: Before considering beaded handle attachment complete, gently stress-test connections by gradually increasing pull force on beaded bags
Fabric and Leather Handle Attachment
- Sandwiched Reinforcement: Place ultrasuede or leather patches both inside and outside your beaded bag where fabric handles attach, creating strength through layered materials
- Hand-Stitching Technique: Use waxed linen thread and leather needles to hand-sew fabric handles to beaded bags with saddle-stitch for maximum strength
- Box-X Pattern: Stitch handles to beaded bags using box pattern with X through center—this distributes stress across eight different thread directions
- Rivet Reinforcement: For heavy-duty fabric or leather handle attachment to beaded bags, install metal rivets through handle, bag material, and internal reinforcement patches
- Edge Folding: Fold raw edges of fabric handles under before attachment to beaded bags, creating finished appearance and preventing fraying
Wooden Bead Handle Mounting
- Cord Threading Method: String wooden bead handles on strong cord, then thread cord ends through beaded bag top edges and secure with multiple knots backed by glue
- End Loop Creation: Finish wooden bead handles with loops formed by the stringing cord, then attach these loops to D-rings or O-rings sewn into beaded bags
- Stopper Bead Security: At each end of wooden bead handles, add smaller stopper beads that prevent the handle from sliding off when attached to beaded bags
- Flexible vs. Rigid: Wooden bead handles on elastic cord require different attachment than rigid-strung versions—adjust techniques accordingly for your beaded bag
-
Decorative Knots: Finish wooden bead handle attachment to beaded bags with visible decorative knots that add visual interest while securing connections
Follow this video to learn more about this Tutotrial.
Reinforcement Techniques for Maximum Durability
After understanding basic attachment methods for beaded bag handles, implementing professional reinforcement techniques ensures your connections withstand years of use without failures. These strategies separate amateur projects from truly durable beaded bags that function reliably under regular carrying stress.
Internal Structural Reinforcement
Backing Patch Application provides the foundation for secure handle attachment to beaded bags. Cut reinforcement patches from ultrasuede, leather, or heavy interfacing approximately 2x3 inches—larger than your attachment points. Position these patches on the interior side of your beaded bag exactly where handles will attach externally. Secure patches using fabric glue, allowing complete drying before proceeding with handle attachment. This distributes stress from concentrated handle attachment points across much wider areas of your beaded bag structure.
Sandwich Reinforcement Method creates the strongest possible handle connections by placing reinforcement materials on both sides of your beaded bag material. After attaching your backing patch internally, add a second smaller patch externally around the actual handle attachment point. When you stitch or rivet handles to your beaded bag, hardware passes through all layers—exterior patch, bag material, and interior patch—creating virtually indestructible connections that distribute stress throughout the reinforcement system.
Plastic Canvas Integration works beautifully for beaded bags constructed using plastic canvas foundation methods. When initially cutting canvas panels for your beaded bag, extend the top edge upward by 1-2 inches beyond where your bag will actually finish. These extensions fold inward after beading, creating double-thickness reinforced areas specifically designed for handle attachment that maintain the plastic canvas's structural integrity throughout your beaded bag.
Strategic Stress Distribution
Multiple Attachment Points prevent concentrated stress that causes handle failures on beaded bags. Rather than attaching each handle end at a single point, spread the connection across 2-4 separate locations spanning 1-2 inches along your beaded bag edge. Thread the handle attachment cord, wire, or straps through multiple points, creating a distributed stress pattern. This approach proves particularly crucial for heavy beaded bags or those intended for daily use where accumulated stress could overwhelm single-point attachments.
Gradual Tension Transition prevents the sharp stress concentrations that occur where rigid handles meet flexible bag bodies. Create graduated reinforcement by using multiple layers of progressively smaller patches around handle attachment points on your beaded bag. The largest patch extends farthest into the bag body, with smaller patches stacked above it, creating a gradual transition from the rigid handle attachment area to the flexible beaded surface that prevents sudden stress concentration points.
Edge Reinforcement Strips strengthen the entire top edge of your beaded bag before handle attachment, preventing localized failures. Sew grosgrain ribbon or twill tape along the interior top edge of your beaded bag, extending 3-4 inches on either side of planned handle attachment points. When you subsequently attach handles to your beaded bag, you're securing them to reinforced edges rather than beadwork alone, dramatically improving durability and longevity.
Hardware-Based Reinforcement
Metal Washer Distribution spreads stress from hardware connections across wider areas when attaching handles to beaded bags. Place flat metal washers between hardware (such as screw posts or rivets) and both the exterior and interior surfaces of your beaded bag. These washers prevent the relatively small diameter hardware from cutting into or pulling through softer bag materials, extending the effective stress distribution area significantly on your beaded bag.
D-Ring Installation Systems create permanent, reinforced attachment points for removable handles on beaded bags. Sew D-rings to your bag using heavy-duty thread in box-X patterns described earlier, backed by substantial reinforcement patches. Once installed, these D-rings allow easily swapping different handle styles on your beaded bag without repeatedly stressing the same attachment points with new installations that could gradually weaken connections.
Grommet and Eyelet Reinforcement provides metal-reinforced holes for handle cord or strap passage through your beaded bag. Install metal grommets or eyelets at handle attachment points using appropriate setting tools, then thread handle straps through these reinforced openings. The metal eyelet distributes stress around its entire circumference rather than allowing straps to cut into bag material, significantly extending handle attachment longevity on your beaded bag.
Thread-Based Reinforcement Strategies
Multiple Thread Passes multiply the strength of hand-sewn handle attachments to beaded bags. Rather than a single pass of thread securing handles, make 3-4 complete passes through all attachment points using fresh thread for each pass. This redundancy ensures that even if one thread eventually fails on your beaded bag, remaining passes continue supporting the handle attachment while you complete repairs.
Thread Lock-Stitching prevents gradual loosening of hand-sewn handle attachments on beaded bags. After completing your attachment stitching, create lock stitches by passing your needle back through previous stitches, creating loops that secure earlier work. These locks prevent the catastrophic unraveling that can occur when a single thread end works loose on beaded bag handles, instead containing any failure to small sections that won't compromise overall attachment security.
Adhesive Thread Sealing adds a final layer of security to all thread-based handle attachments on beaded bags. After completing your stitching and creating proper knots, apply thread sealant or clear nail polish to all knots and the final inch of thread woven into your beadwork. This chemical bonding supplements mechanical knot strength, creating connections that resist both tension stress and the gradual working-loose that occurs through repeated handle use on beaded bags.
Professional Finishing and Troubleshooting
After successfully attaching beaded bag handles, proper finishing techniques and knowing how to address common problems ensures your connections remain secure and attractive throughout your bag's lifetime. These final considerations separate adequate attachments from truly professional-quality beaded bag construction.
Aesthetic Finishing Techniques
Connection Point Concealment improves the professional appearance of handle attachments on beaded bags. When attachment hardware or thread passages remain visible, consider covering them with decorative elements—perhaps small beaded medallions, fabric rosettes, or strategically placed trim. These embellishments transform functional necessities into intentional design features that enhance rather than detract from your beaded bag aesthetics.
Matching Hardware Finishes ensures visual cohesion between handles and attachment hardware on your beaded bag. If using gold-tone chain handles, select jump rings, D-rings, and any visible hardware in matching gold finishes. This attention to detail creates polished, intentional appearance rather than the mismatched look of randomly combined components that characterizes amateur beaded bag construction.
Clean Thread Work prevents the messy appearance of visible thread tails or irregular stitching around handle attachments on beaded bags. Weave all thread ends invisibly into nearby beadwork or lining fabric rather than simply trimming them close to knots. Take time to create even, consistent stitches when hand-sewing handles to beaded bags, as these details significantly impact the overall quality perception of your finished accessory.
Functional Testing and Adjustments
Graduated Weight Testing verifies that your handle attachments can withstand anticipated use on beaded bags. Begin by hanging your empty bag by its handles for several hours, checking for any loosening or distortion. Gradually add weight to the bag's interior, increasing from light (equivalent to phone and wallet) to maximum anticipated load (fully packed bag). Monitor handle attachment points throughout this testing on your beaded bag for signs of stress or failure.
Comfort Optimization ensures your beaded bag handles feel pleasant during extended carrying. Test how handles rest on your shoulder or in your hand, checking for sharp edges, uncomfortable weight distribution, or twisted positioning. Make any necessary adjustments to handle length, positioning, or attachment angles on your beaded bag before considering the project complete, as comfort issues rarely improve with use and often worsen over time.
Balance Verification confirms that attached handles position correctly on your beaded bag for comfortable, stable carrying. Hang the bag by its handles and observe how it hangs—it should rest level rather than tilting to either side. If imbalance occurs, verify that handle attachment points sit symmetrically on your beaded bag, then adjust if necessary before permanent securing creates difficulties in making corrections.
Common Problems and Solutions
Handle Twisting Issues occur when handles rotate or curl rather than hanging flat on beaded bags. This typically indicates that attachment points sit too far apart or that handles themselves lack sufficient structure. Solutions include moving attachment points closer together, adding swivel hardware that allows natural handle movement, or inserting structural cores into fabric handles that prevent twisting on your beaded bag.
Stress Point Failures manifest as tearing, thread breaking, or hardware pulling through material at handle attachment locations on beaded bags. When caught early, reinforce the affected area by adding additional backing patches and redistributing attachment across more points. If failure has progressed significantly, you may need to relocate handle attachments to adjacent undamaged areas of your beaded bag, reinforcing the new locations substantially before reattaching.
Asymmetrical Appearance where one handle looks different from the other detracts from your beaded bag's professional appearance. This usually results from inconsistent attachment techniques between the two sides. To correct asymmetry, carefully document the better-looking attachment, then modify the problematic side to match using the same thread tension, stitch pattern, and hardware positioning as your reference side on the beaded bag.
Long-Term Maintenance Guidance
Periodic Inspection Schedules help identify developing problems before they become catastrophic failures in beaded bag handles. Every few months of regular use, carefully examine all handle attachment points on your beaded bag, checking for loosening hardware, fraying threads, or material wear. Early detection allows simple reinforcement repairs rather than complete reattachment that becomes necessary when problems progress unnoticed.
Preventive Reinforcement extends the life of handle attachments on frequently-used beaded bags. If you notice any slight loosening or wear beginning at attachment points, immediately add reinforcing stitches or apply thread sealant to vulnerable areas of your beaded bag handles. This proactive approach prevents minor issues from escalating into major structural failures that require extensive repairs.
Repair-Friendly Design considers future maintenance needs when initially attaching handles to beaded bags. Use attachment methods that allow accessing and reinforcing connections without destroying surrounding beadwork. Avoid permanent adhesive-only attachments on valuable beaded bags, instead favoring mechanical connections (stitching or hardware) that can be reinforced or replaced without damaging the bag body itself.
FAQ About How to Attach Beaded Bag Handles
What is the strongest way to attach handles to a beaded bag?
The strongest method for attaching handles to beaded bags combines multiple reinforcement strategies simultaneously. Use heavy-duty thread or wire making multiple passes through reinforced attachment points, backed by substantial ultrasuede or leather patches on both interior and exterior surfaces of your beaded bag. Add metal washers under hardware to distribute stress, and spread each handle attachment across 3-4 separate connection points rather than concentrating stress at single locations.
For maximum strength on beaded bags intended for daily use or heavy loads, consider installing metal grommets at handle attachment points, then threading straps through these reinforced openings. This combination of reinforcement patches, multiple attachment points, and metal stress distribution creates handle connections capable of withstanding years of intensive use on your beaded bag.
Can I attach handles to a beaded bag without sewing?
Yes, you can attach handles to beaded bags without traditional sewing using several alternative methods. For beaded bags constructed on plastic canvas, weave strong fluorocarbon line or beading wire through canvas holes and handle attachment points—this threading technique requires no needles or stitching skills. Metal hardware like screw posts, rivets, or grommets create permanent handle attachments using only installation tools rather than sewing.
Strong adhesives like E6000 can bond certain handle types to beaded bags when combined with reinforcement patches, though adhesive-only attachments suit lighter-weight accessories rather than heavy daily-use bags. Jump rings and lobster clasps connect chain handles to beaded bags using only pliers to open and close hardware—no sewing required for these connections.
How do I attach removable handles to a beaded bag?
Attaching removable handles to beaded bags requires installing permanent hardware attachment points on your bag that accept various handle styles. Sew D-rings or O-rings securely to reinforced areas along your beaded bag's top edge using heavy-duty thread in box-X patterns. These rings become permanent parts of your beaded bag, while handles attach and detach using lobster clasps or swivel clips.
Alternatively, install male portions of magnetic snap closures at handle attachment points on your beaded bag, then attach female portions to your handles. This allows quick snap-on/snap-off handle changes without visible hardware when handles are removed. Ensure all permanent attachment hardware receives substantial reinforcement backing to withstand repeated attachment and removal stress on your beaded bag.
Where should handles be positioned on a beaded bag?
Proper handle positioning on beaded bags depends on your desired silhouette and carrying style. For shoulder bags, attach handles approximately 1-3 inches from the outer side edges of your beaded bag, with attachment points 4-6 inches apart. This positioning allows the bag to hang comfortably against your body while preventing handles from sliding off your shoulder.
For hand-carried clutches or small beaded bags, center handles more closely, with attachment points just 2-3 inches apart. Crossbody beaded bags benefit from wider handle spacing (5-8 inches between attachment points) that distributes weight more evenly. Always position handles symmetrically on your beaded bag—measure carefully from both edges to ensure balanced placement that prevents tilting when carried.
How much weight can beaded bag handles support?
The weight capacity of beaded bag handles depends entirely on attachment method strength and reinforcement quality. Properly attached handles using the reinforcement techniques described in this guide typically support 5-10 pounds comfortably on small to medium beaded bags—more than sufficient for typical contents like phones, wallets, and cosmetics.
However, fully beaded handles constructed entirely from thread and beads generally support less weight (2-4 pounds maximum) than chain or fabric handles due to their thread-based construction. For heavy-duty daily beaded bags requiring greater capacity, use substantial chain or leather handles with industrial-strength attachment including metal hardware, multiple reinforcement patches, and distributed attachment points that can support 15+ pounds safely.
Can I change handles on a beaded bag after it's finished?
Changing handles on finished beaded bags presents varying difficulty depending on original attachment methods. Beaded bags designed with removable handles using D-rings, O-rings, or lobster clasp systems allow easy swapping between different handle styles without any structural modifications. Simply detach existing handles and attach alternatives using the same permanent hardware on your beaded bag.
For beaded bags with permanently sewn or glued handles, replacement requires carefully removing original attachments without damaging surrounding beadwork, then attaching new handles using techniques described in this guide. This process works best when original attachment points remain structurally sound and adequately reinforced. If changing handles on valuable beaded bags, consider consulting experienced bag makers to avoid inadvertently damaging your beadwork during the modification process.
Conclusion
Mastering how to attach beaded bag handles elevates your beading projects from decorative craft pieces to fully functional accessories that withstand regular use while maintaining professional quality. Throughout this comprehensive guide, you've discovered essential techniques—from selecting appropriate handle styles and implementing proper reinforcement to executing professional attachment methods and addressing common problems—ensuring your beaded bag handles remain securely connected for years of beautiful, reliable service.
The critical importance of proper handle attachment to beaded bags cannot be overstated. This single element determines whether your carefully crafted beadwork functions as a practical accessory or becomes merely a decorative object unsuitable for actual carrying. Investing time in reinforcement, using quality materials, and following professional attachment techniques transforms your beaded bags into heirloom-quality pieces that combine artistic beauty with engineering integrity worthy of designer accessories.
Remember that attaching beaded bag handles represents an investment in your craft that pays dividends through every use of your finished accessory. While proper attachment requires additional effort beyond basic beading, the resulting durability and functionality justify this investment. Your beaded bags will confidently accompany you through countless occasions, receiving compliments while reliably protecting contents—exactly what well-crafted accessories should provide.
Whether you're creating structured handbags with chain handles, bohemian totes with wooden bead straps, or elegant evening clutches with beaded handles, the attachment techniques you've learned ensure your connections withstand the test of time. Embrace these professional methods to attach your beaded bag handles with confidence, creating accessories that express your unique style through beautiful, durable design that lasts!


No comments


0 comments